Raspberry Pi media centre
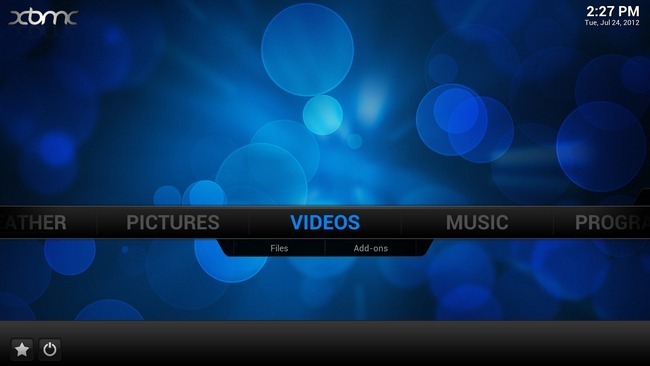
Raspbmc, the Raspberry Pi media centre solution
I recently splashed out on a new Samsung UE40ES6800 smart TV and Onkyo TX-NR 414 receiver with a pair of Monitor Audio Bronze BX2 shelf speakers for my media / centre in the new flat. I wanted something which would give me an enjoyable picture for occasional viewing of shows and films with some good sound. I’ve already encoded many of my DVD and Blu Ray discs to MP4 or MKV h.264 formats and stored them on my D-Link DNS-323 and I had previously served everything through my computer running XBMC, but now I needed something affordable and quiet. Enter the Raspberry Pi media centre.
Combining the Pi and XBMC to make a Raspberry Pi media centre
 For many months now I had been using XBMC on my PC as my media software of choice. It has a simple yet pleasant interface which is easily configurable allowing playback of media over your local home network. There are alternatives, such as Plex and but I found that the XBMC interface was what I wanted combined with ease of setup and use.
Whilst my TV has some smart functionality (for instance it has applications for Netflix, LoveFilm, iPlayer and other catchup TV services) its support for DLNA is through a Samsung proprietary system (known as AllShare) which simply shares media from your computer. The whole point was to be able to turn off the computer and sit down to watch something in comfort, not to leave it running in the other room. Further to that I discovered that AllShare only supports media on your local drives, meaning network storage couldn’t be added to its library.
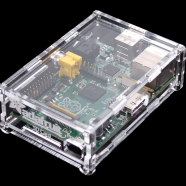
I could have built what is often referred to as an HTPC (Home Theatre PC), but the cost, £200+ most likely, was just too much for what I wanted to do. On the other hand I could buy a Raspberry Pi and suitable case for around £30 then use one of my USB chargers and spare SD card to get it up and running. A very simple decision to make in my mind.
Something which is very admirable about the Raspberry Pi community is that there are hundreds, if not thousands, of projects out there which are being developed actively. Raspbmc is a port of the Debian Linux based XMBC software to allow you to create a Raspberry Pi media centre with ease. It quite literally took me 6 minutes from walking in the door to completion of the process.
I downloaded the windows installer and told it to create the start up image on my SD card. After that I plugged my Pi into the network switch in the living room, put in the SD card and plugged in the power. From there I just sat and watched (and psoted on Instagram like the excited kid I was) as it cycled through downloading the install image, rebooting, updating, configuring and finally presenting the familiar XBMC interface. It even told me to get a drink while I waited under the simple progress bar, rather than streaming the output of the linux commands across the entire screen.
Sources
Spotify, adding some cloud music to the setup
 Something I wanted to try out was using online music streaming for while I was doing things in the flat like basic exercise routines, or just as background music whilst reading and cooking.
Originally I had intended on using the app on my TV to connect to Spotify and use the service, but it turns out only a very limited range of models are compatible currently. My ES6800 is still not supported currently, after several back and forth emails with both Spotify customer services and Samsung support I found out that only E5000, E6000, E7000 & the E8000 are able to connect it. There is a rather unhelpful “There is something wrong with your account.” message for everyone else …
Fortunately however there is a simple linux Spotify plugin which does work on my Raspberry Pi media centre, and it is remarkably easy to install. Simply open an SSH connection to the Raspberry Pi (Chrome users may want to take a look at my recent list of Google Chrome extensions recommendations), which is enabled by default and issue a single wget call to download the package.
$ wget http://azkotoki.org/download-file/28/script-audio-spotimc-1-0-beta4.zip
Once that was downloaded to the user folder (/home/pi) on the SD card I went back to the Raspbmc interface with my TV remote and selected install addon from Zip file, picked the newly acquired file and left it to install. On first run it did an update but after that it picked up my playlists happily enough when I logged in.
Sources
- http://www.raspbmc.com/wiki/user/using-ssh/
- http://www.linux-answered.com/2013/02/03/raspberry-pi-raspbmc-media-center-including-spotify/
Menus and playback first impressions
Unsurprisingly it took the Raspberry Pi media centre a few minutes to scan my network storage and populate the library, but once done it is fairly smooth considering the tiny processor powering the unit.
If you try to scroll quickly through large numbers of films the thumbnails aren’t loading in as quick as you are moving through the list so you get black place holder images. However if you stop it soon loads them (I have around 130 films in my Movies library).
With Raspbmc you are limited to a basic Confluence skin, so those, like I did with my PC installation, looking to use more polished skins like Aeon Nox will find that becomes sluggish and doesn’t work. There are, as far as I can tell, still all the important options in the menus and with a compatible wireless keyboard it is easy to use.
Playing back 1080p video with DTS sound was where I experienced the biggest issue. After just a few minutes of playback the Pi would pause the playback, buffer for 4-5 seconds, then start again. Sometimes it would continue for a long time but at others it would stutter like this every couple of minutes. Regardless of how often it occurred though this isn’t the experience I wanted so I investigated further.
Improving performance – library as mounted NFS
After some reading I found that apparently because of the additional overhead involved with reading from a Samba share (SMB) the Pi will cause too much for a unit over clocked to the 800 default of Raspbmc. To test this I decided to install an addon for my NAS to enable NFS share, and then mount this to the Pi, which would help reduce the networking demands on the processor of the Pi.
With Raspbmc you can select an NFS folder directly in the library, or you can choose to mount the directories to your Pi instead. I went with mounting the directories. In order to do this I first created the destination directories and then opened the fstab file to ensure they are mounted on reboot.
$  sudo mkdir /mnt/movies
$  sudo mkdir /mnt/tvshows
$  sudo nano /etc/fstab
I needed to add two lines to add these directories.
192.168.*.*:/volume_1/uPNP/video/movies /mnt/movies nfs nouser,atime,auto,rw,dev,exec,suid 0 0
192.168.*.*:/volume_1/uPNP/video/TV\040shows /mnt/tvshows nfs nouser,atime,auto,rw,dev,exec,suid 0 0
The important point part for me was the fact that the directory for TV shows had a space in the name, but fstab uses space delineation so the space had to be escaped. Entering \040 replaced the space in the directory name and solved the issue. Once done simply hit ctrl+O > y to save, ctrl+X to exit. Then to do the initial set up a single command is issued:
$ sudo mount -a
At this point both folders were mounted and I could add new folders to the library by selecting the root file system and navigating to /mnt.
Since then I have played back Thor, a MKV encoded 1080p video using h.264 with AAC DTS, which only had the tiniest of stutter which lasted less than a second, only once and was barely noticeable. In fact it might not have been something I would have noticed had I not been trying to resolve this issue in the first place.
Playing an episode of Generation Kill though had the slightly more issues, apparently it is possible to reduce overhead on the Pi even further though by having the audio passed through to the receiver. Currently my Pi output is passed directly to TV however which is outputting audio to the receiver via a digital audio cable. I have a new HDMI cable coming to let me put the Pi in a better position and will test passing the audio through the receiver that way.
I will of course need to watch more videos encoded to this high standard to test further and figure out audio pass through.
Sources
- ftp://ftp.dlink.com/Multimedia/dns323/Apps/dns323_NFS%20_Package_v100.zip
- http://v1chak.blogspot.co.uk/2013/03/raspbianraspbmc-how-to-mount-nfs.html
- http://www.linuxquestions.org/questions/linux-server-73/fstab-entry-for-nfs-mount-of-directory-with-a-space-808657/
Improving performance – Overclocking
Another way to improve performance of the device is to overclock (there is also overvolting, but this isn’t something I’ve tried nor is it generally recommended). Raspbmc does increase the CPU clock by default from 700 to 800 but it doesn’t overclock the GPU or anything else. Something to keep in mind is that overclocking will put more stress on your Pi resulting in higher temperatures and thus potential for early death of components.
To edit the config you use nano:
$ sudo nano /boot/config.txt
At this point you will want to consider what you want to increase. Once you have adjusted/added lines simply ctrl+O then ctrl+x before restarting the pi
$ sudo reboot
Currently I have increased my cpu_freq to 900 and sdram_freq to 500 which has reduced stutter I’ve noticed in Generation Kill but not eliminated it completely. The Pi sits happily at around 58C both CPU and GPU temp whilst playing, which is 2 or 3 degrees higher than it was prior to my increased overclockign. My next test will be to try setting core_freq and sdram_freq to 450 as I’m noticing the frame rate drops at the stutter points.
Sources
ZNC, an added extra
As I chat in IRC on the Quakenet servers regularly I had wanted to try out having a bouncer for a while. A few friends make use of ZNC which it turns out is something relatively easy to acquire and install.
Step 1
Install via apt-get and run configuration. Simply enter the commands below. When you are in the config simply hitting enter when presented with a prompt will accept the default value shown in square brackets, e.g. [yes]
$  sudo apt-get install znc znc-extra

... Wait for the install to complete

$  znc --makeconf

... This is a rough example of what you'll walk through, options should be obvious

[ ** ] Building new config
[ ** ]
[ ** ] First lets start with some global settings...
[ ** ]
[ ?? ] What port would you like ZNC to listen on? (1 to 65535): 6667
[ ?? ] Would you like ZNC to listen using SSL? (yes/no) [no]: yes
[ ?? ] Would you like ZNC to listen using ipv6? (yes/no) [no]:
[ ?? ] Listen Host (Blank for all ips):
[ ** ]
[ ** ] -- Global Modules --
[ ** ]
[ ?? ] Do you want to load any global modules? (yes/no): yes
[ ** ] +-----------+----------------------------------------------------------+
[ ** ] | Name      | Description                                              |
[ ** ] +-----------+----------------------------------------------------------+
[ ** ] | partyline | Internal channels and queries for users connected to znc |
[ ** ] | webadmin  | Web based administration module                          |
[ ** ] +-----------+----------------------------------------------------------+
[ ** ] And 10 other (uncommon) modules. You can enable those later.
[ ** ]
[ ?? ] Load global module <partyline>? (yes/no) [no]: yes
[ ?? ] Load global module <webadmin>? (yes/no) [no]: yes
[ ** ]
[ ** ] Now we need to setup a user...
[ ** ]
[ ?? ] Username (AlphaNumeric): ragnar
[ ?? ] Enter Password:
[ ?? ] Confirm Password:
[ ?? ] Would you like this user to be an admin? (yes/no) [yes]:
[ ?? ] Nick [Ragnar]:
[ ?? ] Alt Nick [Ragnar|]:
[ ?? ] Ident [Ragnar]:
[ ?? ] Real Name [Got ZNC?]:
[ ?? ] VHost (optional):
[ ?? ] Number of lines to buffer per channel [50]: 1000
[ ?? ] Would you like to keep buffers after replay? (yes/no) [no]:
[ ?? ] Default channel modes [+stn]:
[ ** ]
[ ** ] -- User Modules --
[ ** ]
[ ?? ] Do you want to automatically load any user modules for this user? (yes/no): yes
[ ** ] +-------------+-------------------------------------------------------------------+
[ ** ] | Name        | Description                                                       |
[ ** ] +-------------+-------------------------------------------------------------------+
[ ** ] | admin       | Dynamic configuration of users/settings through irc               |
[ ** ] | chansaver   | Keep config up-to-date when user joins/parts                      |
[ ** ] | keepnick    | Keep trying for your primary nick                                 |
[ ** ] | kickrejoin  | Autorejoin on kick                                                |
[ ** ] | nickserv    | Auths you with NickServ                                           |
[ ** ] | perform     | Keeps a list of commands to be executed when ZNC connects to IRC. |
[ ** ] | simple_away | Auto away when last client disconnects                            |
[ ** ] +-------------+-------------------------------------------------------------------+
[ ** ] And 33 other (uncommon) modules. You can enable those later.
[ ** ]
[ ?? ] Load module <admin>? (yes/no) [no]: yes
[ ?? ] Load module <chansaver>? (yes/no) [no]: yes
[ ?? ] Load module <keepnick>? (yes/no) [no]: yes
[ ?? ] Load module <kickrejoin>? (yes/no) [no]: yes
[ ?? ] Load module <nickserv>? (yes/no) [no]:
[ ?? ] Load module <perform>? (yes/no) [no]:
[ ?? ] Load module <simple_away>? (yes/no) [no]: yes
[ ** ]
[ ** ] -- IRC Servers --
[ ** ]
[ ?? ] IRC server (host only): irc.quakenet.org
[ ?? ] [irc.freenode.net] Port (1 to 65535) [6667]:
[ ?? ] [irc.freenode.net] Password (probably empty):
[ ?? ] Does this server use SSL? (probably no) (yes/no) [no]:
[ ** ]
[ ?? ] Would you like to add another server? (yes/no) [no]:
[ ** ]
[ ** ] -- Channels --
[ ** ]
[ ?? ] Would you like to add a channel for ZNC to automatically join? (yes/no) [yes]: yes
[ ?? ] Channel name: #...
[ ?? ] Would you like to add another channel? (yes/no) [no]:
[ ** ]
[ ?? ] Would you like to setup another user? (yes/no) [no]:
[ ok ] Writing config [/home/ragnar/.znc/configs/znc.conf]...
[ ** ]
[ ** ] To connect to this znc you need to connect to it as your irc server
[ ** ] using the port that you supplied.  You have to supply your login info
[ ** ] as the irc server password like so... user:pass.
[ ** ]
[ ** ] Try something like this in your IRC client...
[ ** ] /server <znc_server_ip> 6667 ragnar:<pass>
[ ** ]
[ ?? ] Launch znc now? (yes/no) [yes]:
[ ok ] Opening Config [/home/znc/.znc/configs/znc.conf]...
[ ok ] Binding to port [+6666] using ipv4...
[ ** ] Loading user [znc]
[ ok ] Loading Module [admin]... [/usr/lib/znc/admin.so]
[ ok ] Loading Module [chansaver]... [/usr/lib/znc/chansaver.so]
[ ok ] Loading Module [keepnick]... [/usr/lib/znc/keepnick.so]
[ ok ] Loading Module [simple_away]... [/usr/lib/znc/simple_away.so]
[ ok ] Adding Server [irc.freenode.net 6667]...
[ ok ] Loading Global Module [webadmin]... [/usr/lib/znc/webadmin.so]
[ ok ] Forking into the background... [pid: 15983]
[ ** ] ZNC 0.092+deb3 - http://znc.sourceforge.net
Step 2
The configuration above is pretty self explanatory, and once complete as long as you enabled web admin you can go to the address of your pi followed by the listen port to use the simple interface to make changes. For example it could be http://192.168.1.94:6667 to access the web pages. The only thing I found I had to do was set my bindhost to 0.0.0.0 as otherwise ZNC couldn’t connect to the IRC server.
Once done though you will want to make sure that ZNC runs automatically when the Pi is rebooted. To do so you need to install ZNC as a system daemon, aka service. This can be achieved with a few lines of code:
$  sudo mkdir /usr/lib/znc/configs
$  sudo cp ~/.znc/configs/znc.conf /usr/lib/znc/configs/
$  sudo chown -R znc:znc /usr/lib/znc
$  sudo nano /etc/init.d/znc

... Insert the necessary script into the file (Shift+Insert for most SSH consoles to paste)
... change all references of /var/lib to /usr/lib
... Ctrl+O then Ctrl+X to save and exit

$  sudo chmod 755 /etc/init.d/znc
$  sudo nano /usr/lib/znc/configs/znc.conf

... Insert this at the top of the file: PidFile = /var/run/znc/znc.pid
... Then once again Ctrl+O and Ctrl+X to save and exit

$  sudo service znc start
$  sudo chkconfig znc on
Step 3
Connect to ZNC! If you are using classic mIRC then this is fairly simple to do, I however use Trillian and found I needed to configure the server password appropriately.
Now your Raspberry Pi media centre can also perform nicely as an IRC bouncer as well, genius considering this is a simple £30 device.
- http://pi.gadgetoid.com/post/042-setting-up-znc-irc-bouncer-on-the-raspberry-pi
- http://wiki.znc.in/Running_ZNC_as_a_system_daemon
- http://b.wardje.eu/2011/12/znc-failing-to-connect.html
Accessories
Something to bear in mind when you buy a Raspberry Pi is that you’ll need and/or want to consider:
- a power supply, the model B uses micro USB to delivery 5V via either standard USB charger if you want it mains powered or a powered USB hub / port
- an SD card, keep in mind for the likes of a media centre you want good speeds and space e.g. Class 10 and 8Gb or more
- an HDMI or RCA cable to connect to a screen
- a USB keyboard for input, I went with the Rii keyboard which plugged in and worked out of the box with the Pi
- an external USB drive, either thumb drive or powered hard drive, as extra storage or faster OS drive
- heatsinks for your CPU and GPU if you are overclocking, just check out eBay
Conclusion, Raspberry Pi media centre
All in all my Raspberry Pi media centre was set up within an hour and now serves its purpose perfectly given its expected limitations. There are other options out there such as Xbian or OpenElec, these are things I might look at in future when I buy another Pi. Yes, another, I really like these little units!
If you want a silent unit which will playback 1080p videos with stereo, or better sound with some tweaking, then the Raspberry Pi may well give you what you want for a nice cheap price.
Should you want something which will do more, such as PVR or perhaps a little bit of gaming, then you might want to crank up the budget and look at building a full HTPC from perhaps an atom processor base.


hi there
i just bought samsung smart tv and ofcourse i cant have xmc on it, do u think if i do the same thing as u did will work?
Absolutely, I’ve been using XBMC on raspberry pi for quite a while now. In combination with the Samsung SmartTV software you can have plenty options for what you want to view or listen to.